Monday, February 8, 2016

New Bohemian {Master Bedroom Design: The Beginning}

Hi everyone! I took a little bit of a break after completing Babygirl's room. We are enjoying our new house and she is truly enjoying her room. I decided the next room to redesign would be mine. There are days that I will spend the entire day hanging out in my room, working or reading or even browsing the Internet and watching Hulu or Amazon Prime Instant Videos. And although we have an entire house to get through, my room was naturally next on the list because it is also my retreat.

Keeping with my belief that you should live in a space that you truly love no matter how much or how little money you have to spend, I set out with a gazillion ideas. I am an event designer and I love so many themes and ideas. I went from masculine modern to sexy bordella as well as Palm Springs resort inspired and I just couldn't decide. So I took a step back and did some true soul searching. I thought about the home decor I've loved most in my past. I considered the type of clothing I am most drawn to. What makes me comfortable. What decade in my life did I feel most loved. And I settled on a modern spin on 1970s bohemian.

This is the final inspiration board. I will not waver. I am sticking to it and I'm pretty darned excited about it.

Here is a list of the posts you can expect to see in this upcoming series that I am calling "I'm Not a Girl {Babygirl's Room Design}":

Step 1: The Gameplan

Step 2: Spatial Planning

Step 3: Painting Walls Back to White

Step 4: Finding the Perfect Rug

Step 5: Ombre Tassel Window Treatments

Step 7: Tipi Bookshelf

Step 8: Macarame and Feather Wall Hanging

Step 9: Side Table Makeover

Step 10: Wire Cage Pendant Lamp with Macrame Lamp Cord

Step 11: DIY Painted Arrows

Step 12: DIY Succulent Wall Planter

Step 13: DIY Rope Baskets

Step 14: DIY Aztec Accent Pillows

Step 15: DIY Clay Plant Pots

Step 16: DIY Macrame Plant Hangers

Step 17: DIY Pallet Bed

Step 18: DIY Anthro Knock-off Corine Duvet Cover {Part 1}

Step 19: DIY Anthro Knock-off Corine Duvet Cover {Part 2}

Step 20: DIY Ginormous Rag Rug

Step 21: Anthro Knock-off Wire Script Wall Scuplture

Step 22: Finding the Perfect Seating Arrangement

Step 23: To Paint an Accent Wall or Nah...

Step 24: Sources for the Details

Step 25: The Before and After

Tuesday, July 28, 2015

An Elephant Nursery for Kassius

You guys have patiently waited for the big nursery reveal of my sweet grandson Kassius. Well the wait is FINALLY over. Today I'm sharing the whole room all put together (and not a moment too soon since soon Kassius will be moving out of his room and relocating with his mommy and daddy to Dallas!).

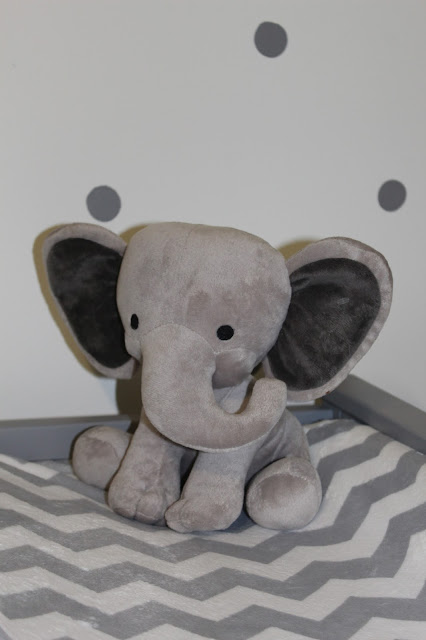
The playful and modern tiny polka dots painted using Lullaby Paints ($27) in a custom steel grey really added charm and whimsy, especially when paired with a minty green accent wall for a room that will really be fun for Kassius to sleep and play in.

We used the same paint to spruce up a small solid wood side table that we found discarded on the side of the road ($0). It now used to store bath items in a small storage basket I picked up at TJ Maxx ($5). We stashed his thermometer, nasal aspirator, teething tablets and baby Tylenol in there. All the things she will need to trake care of Kassius. I added a cute little canvas art print to tie the yellow and grey back into the design ($7). 

We also painted a lovely crib donated by one of my daughter's co-workers ($0). It is so great, with it's built in changing table, shelves and drawers for storing receiving blankets, onesies, diapers and baby wipes. My daughter found a super cute grey and yellow elephant crib bedding set ($24) that us further establish Kassius's color scheme.

My daughter also wanted to incorporate a chevron pattern, so she picked up this really soft changing pad cover ($5).

Do you see that cool elephant storage bin on the floor? Also found at TJ Maxx ($14). It is the perfect basket for dirty clothes and blankets and it was an added fun design element that offered functional storage.

My daughter bought a piece of fleece ($9) and asked me to sew a blanket for Kassius. Instead I created a fleeced tied blanket. I think it's super cute and definitely cozy.

And of course the minty green accent wall I mentioned that my daughter wanted to add. We just picked up a can of sample paint and had them create the custom color she wanted to go for (just $4). It really help bring the room together while bouncing around a warm, soothing light, which is always a good thing in a baby's nursery.

I just couldn't help but add polka dots to the back wall in Kassius's walk-in closet. Isn't it adorable?

GRAND TOTAL FOR THIS NURSERY DESIGN: $96

Not bad for a room that turned out as cute as it did, right? It’s especially amazing to me when we look at what we created for very little money. You could easily spend $96 on a small side table, so the fact that it includes a crib, storage bins, a side table, painted wall designs and a small canvas, makes me grin from ear to ear. We loved using paint and low cost accessories along with items of furniture that my daughter already had (or gratefully inherited) to create such a sweet little place for my grandson to lay his little head.

So that’s the story of an empty room going from bare to baby-ready without depleting my daughter’s diaper fund. And of course she and I are already talking about adding cute curtains and other elements once they are settled into his new home in Dallas.

But what about you guys? Any babies on the way? Any nursery projects you’ll be taking on? Any older kids’ rooms that you’ll be decking out on a serious budget? I'm actually in the process of starting the design on my walk in "glam room" closet so stay tuned for that…

xoxo

Tuesday, January 20, 2015

What's For Dinner | Cheesy Spinach Quiche

This super cheesy spinach quiche is baked in my favorite homemade pie crust. Impress all your brunch guests with this recipe!

Right around Thanksgiving time, I had a phone call with my BFF Tia. While talking to me she was bravingthe cold Indiana weather in search of a pack of Knorr's Leek Soup for two of her famous quiches, broccoli with cheese and spinach.

Following Thanksgiving, I hit her up for the recipe. She laughed, gave me a quick list of ingredients (no measurements) and told me she was heading to bed and will call me the next day with the exact amounts. Yeah... still waiting for her call. Methinks she wants to keep her special recipes for herself. LOL.

Well, I have been dreaming about making quiches the entire month! So I decided to take matters into my own hands and try to create something yummy and quiche-y for our home. (Yes, quiche-y is a word... because I said so!)

I couldn't decide between her spinach quiche or broccoli and cheese quiche, so I took something from each of them and came up with one ultra cheesy, ultra savory, seasoned, spinach extravaganza. I baked it all in my homemade flaky pie crust. My favorite pie crust recipe in the world.
This comforting dish will amaze all of your brunch guests! It's a annual hit with Tia's family and it is now a hit with me and mine. (By the way, Tia totally would have shared her recipe with me if I had reminded her... she is awesome like that.)

So what is quiche?

Quiche is an egg and milk custard filled with all sorts of extras like cheese and veggies. Traditionally, quiches are baked in a pie crust. Any excuse I have to make my buttery, flaky pie crust – I am down for it.

My version uses eggs, whole milk (for an extra creamy texture), cheddar/mozzarella cheeses, parmesan cheese, frozen spinach, garlic, and Knorr Leek Soup Mix. Did I mention this quiche is extra cheesy? Just how I like my scrambled eggs. NOM NOM!

A good tip to know:

The key to preventing a soggy quiche is to reduce the moisture in your vegetables.

I used frozen spinach in my quiche for ease, though fresh would be fine. But my piece of advice? Avoid the hassle and buy a bag of frozen! It’s cheaper, less messy, and easier. Make sure you drain your spinach extra well. Thawed frozen spinach is full of water and you’ll want to blot it as much as you can.

While the spinach is draining its liquid, whip up your egg mixture: eggs, parmesan cheese, salt, pepper, and whole milk.

Creamy and thick, my cheesy egg base will give this quiche the most luxurious texture!

During all this time, your homemade pie crust has been chilling. Do yourself a favor and make it the night ahead of time. That’s exactly what I did. Then, all you have to do is roll it out, pre-bake it for a few minutes and add the veggies, cheeses, and egg mixture on top.

And hey, while you’re at it – thaw the spinach the night before too. We all have hectic schedules, especially in the morning or while entertaining. Save time where you can!

Bake the quiche until it is golden brown on top and the center is no longer liquid. All ovens are different and this could take anywhere from 45 minutes to 1 hour. Start checking around 40 minutes. As the quiche nears its final minutes in the oven, it will begin to puff up. Once you remove it from the oven, it will slightly deflate. It's all good in the 'hood!

My cheesy spinach quiche took 50 minutes. I like it extra toasty on top.

Let it cool for a few minutes, then slice → serve → eat → Mmmm cheesy heaven.

The best part about quiche is that the possibilities are endless!

  • Use your favorite cheeses like feta, goat cheese, mozzarella, or Swiss. 
  • For some smoky flavor, try adding some bacon crumbles. 
  • You could even add some chopped onions, red peppers, artichokes, broccoli. 
  • Or gasp (!!) make it a low carb meal by baking without the pie crust. I’ll be a little sad about your crustless quiche, but I’ll get over it. 

It also makes wonderful leftovers. We reheated it for a quick dinner the night after. Endless possibilities, a snap to make, easy leftovers. One pan, thank you ma’am! Enjoy!

YIELD: one 9-inch quiche
PREP TIME: 30 minutes
TOTAL TIME: 1 hour, 15 minutes

Here is a downloadable recipe card for your collection! xoxo

Ingredients:

  • 1/2 recipe homemade pie crust(step-by-step photos included)
  • 1 (10 oz) box frozen spinach
  • 8 oz fresh mushrooms, sliced
  • 1 teaspoon minced garlic (or chopped roasted)
  • 4 large eggs
  • 1 cup whole milk*
  • 1/3 cup grated parmesan cheese
  • 1 cup shredded cheese (I used cheddar + mozzarella)*
  • salt & pepper, to taste

Directions:

Prepare the pie crust the night before to save yourself some time.
Preheat oven to 350F degrees. If your frozen spinach is not already thawed, thaw it in the microwave per box directions. Drain the spinach in a colander while you prepare the rest of the ingredients.
Place sliced mushrooms in a skillet coated with 1 teaspoon olive oil or nonstick spray, add the garlic, and a sprinkle of salt and pepper. Turn the heat on to medium-high and sauté the mushrooms until they release all of their moisture and no more water remains on the bottom of the skillet, about 6-7 minutes.
On a floured work surface, roll out the chilled pie dough. Turn the pie crust dough about a quarter turn after every few rolls until you have a circle 12 inches in diameter. Carefully place the dough into a 9-inch pie dish. Tuck it in with your fingers, making sure it is smooth. With a small and sharp knife, trim the extra overhang of crust and discard. Pre-bake the pie crust for 8 minutes.
While the pie crust is pre-baking, whisk together the eggs, milk, and parmesan cheese until combined. Sprinkle with salt and pepper. Set aside.
Blot and squeeze the rest of the water out of the thawed spinach. After 8 minutes, remove the pie crust from the oven and spread spinach on top. Add the cooked mushrooms and shredded cheeses. Pour the egg mixture on top. If desired, sprinkle the top lightly with more parmesan cheese and/or salt and pepper.
Bake the quiche until it is golden brown on top and the center is no longer jiggly. Depending on your oven, this will take anywhere between 45 minutes - 1 hour. Mine took 50 minutes. Use a pie shield to prevent the pie crust from over browning, if desired. Allow to cool for 5 minutes before slicing and serving. This quiche makes great leftovers! Store tightly covered in the refrigerator for up to 4 days. Baked quiche freezes very well, up to 2 months.
*My pie crust recipe makes enough dough for two quiches. You can make half of the recipe as suggested in the ingredient list, or make the entire recipe and freeze half of the dough for another quiche, or bake two quiches. The dough may be stored in the refrigerator for up to 5 days or in the freezer for up to 2 weeks. Thaw overnight in the refrigerator before using. 
*Whole milk is heavily preferred for creamiest texture, though your favorite milk may be used instead - keeping in mind the creamy texture will be compromised.
*Use 1 cup total of your favorite cheeses. Try to avoid using 1 whole cup of a strong tasting cheese like feta. You could do 1/2 cup cheddar, 1/2 cup feta. Or 1/3 cup goat cheese, 2/3 cup mozzarella. Or 1/2 cup swiss, 1/2 cup cheddar. Get creative!